用 Eino 构建 AI Agent:Go 开发者的 LangChain 终于来了
Posted on Wed 14 January 2026 in Journal
| Abstract | 用 Eino 框架构建一个智能穿衣助手——结合天气、用户偏好、衣柜数据,给出个性化穿搭推荐 |
|---|---|
| Authors | Walter Fan |
| Category | learning note |
| Status | v1.0 |
| Updated | 2026-01-14 |
| License | CC-BY-NC-ND 4.0 |
用 Eino 构建 AI Agent:Go 开发者的 LangChain 终于来了
Go 开发者等这一天,等了太久了。
开篇:从一个"穿衣困难症"说起
每天早上,我都要经历灵魂拷问:今天穿什么?
看看窗外——多云。打开手机——8 度。翻翻衣柜——一堆衣服。然后陷入选择困难症。
这个场景你熟悉吗?
作为一个程序员,我的第一反应是:能不能写个 AI 来帮我搭配?
需求很简单: - 查一下今天天气 - 看看我衣柜里有什么 - 结合我的喜好(我怕冷、不喜欢太正式) - 给我一套今天的穿搭推荐 - 如果我不满意,能根据反馈调整
用 Python + LangChain?三下五除二就能搞定。
但我是 Go 开发者啊!我的后端服务都是 Go 写的,难道为了这个功能还得起一个 Python 服务?
以前确实没办法。但现在不一样了。
字节跳动开源了 Eino——一个纯 Go 实现的 AI 应用开发框架。
它的目标很明确:让 Go 开发者也能像用 LangChain 一样,优雅地构建 AI 应用。
这篇文章,我就带你用 Eino 构建一个智能穿衣助手——它能查天气、读档案、翻衣柜、给推荐、听反馈。一个真正"能用"的 AI Agent。
一、Eino 是什么?
GitHub: cloudwego/eino
Eino(读作 /ˈaɪnoʊ/)是 CloudWeGo 团队开源的 Go 语言 LLM/AI 应用开发框架。
一句话总结:Eino 之于 Go,就像 LangChain 之于 Python。
Eino 的核心能力
| 能力 | 说明 |
|---|---|
| 组件抽象 | ChatModel、Tool、Retriever、Document Loader 等标准组件 |
| 图编排 | 用 Graph 把多个组件串联起来,实现复杂工作流 |
| 流处理 | 原生支持流式输出,自动处理流的拼接、复制、合并 |
| 回调机制 | OnStart、OnEnd、OnError 等切面,方便做日志、追踪、监控 |
| 类型安全 | 编译时检查组件输入输出类型,减少运行时错误 |
Eino 的项目结构
Eino 生态
├── eino          # 核心框架:类型定义、组件抽象、编排能力
├── eino-ext      # 扩展实现:各种 ChatModel、Tool、Retriever 的具体实现
├── eino-devops   # 开发工具:可视化调试、开发
└── eino-examples # 示例代码:最佳实践
为什么选择 Eino?
- 纯 Go 实现:不用 CGO,不用 Python,部署简单
- 类型安全:编译时检查,比 Python 的运行时错误好太多
- 高性能:Go 的并发模型天然适合 AI 应用的流处理
- 字节背书:CloudWeGo 团队出品,久经考验
- 活跃社区:9.2k Star,持续更新
二、核心概念:理解 Eino 的设计哲学
在写代码之前,我们需要理解 Eino 的几个核心概念。
1. 组件(Component)
Eino 把 AI 应用中常用的"积木块"抽象成了组件。
| 组件类型 | 说明 | 示例 |
|---|---|---|
| ChatModel | 大语言模型 | OpenAI、Claude、Ollama |
| Tool | 工具/函数调用 | 搜索、计算器、API 调用 |
| Retriever | 检索器 | 向量检索、关键词检索 |
| Document Loader | 文档加载器 | PDF、网页、Markdown |
| ChatTemplate | 提示词模板 | 系统提示、Few-shot 示例 |
| Lambda | 自定义函数 | 任意 Go 函数 |
每个组件都有标准的接口:定义好的输入类型、输出类型、Option 类型。
这意味着:你可以像搭积木一样,把不同的组件组合起来。
2. 编排(Orchestration)
单个组件没什么用,把组件串起来才能干活。
Eino 提供了两种编排方式:
Chain(链式):简单的线性流程
Input → ChatTemplate → ChatModel → Output
Graph(图):复杂的非线性流程
        ┌─→ Tool A ─┐
Input → │           │ → ChatModel → Output
        └─→ Tool B ─┘
Graph 编排是 Eino 的杀手锏,它支持:
- 分支:根据条件走不同路径
- 并行:多个节点同时执行
- 循环:Agent 的"思考-行动-观察"循环
- 状态:在节点之间共享状态
3. 流处理(Streaming)
大模型的输出是流式的——它一边生成一边输出,而不是等全部生成完再返回。
Eino 原生支持流处理,而且做了很多自动化的工作:
| 场景 | Eino 的处理 |
|---|---|
| 下游需要完整输入 | 自动拼接流 |
| 下游需要流输入 | 自动传递流 |
| 多个下游节点 | 自动复制流 |
| 多个上游流汇合 | 自动合并流 |
这意味着:你不用关心流的细节,Eino 帮你处理好了。
4. 回调(Callback)
AI 应用需要日志、追踪、监控。Eino 提供了切面机制:
OnStart:组件开始执行前OnEnd:组件执行完成后OnError:组件执行出错时OnStartWithStreamInput:流输入开始时OnEndWithStreamOutput:流输出结束时
你可以在这些切面里做任何事情:打日志、发指标、记录 Trace。
三、实战:用 Eino 构建一个智能穿衣助手
理论讲完了,来点实际的。
我们要构建一个智能穿衣助手 Agent——它能:
- 查询用户所在城市的天气
- 获取用户的个人信息(年龄、性别、身体状况、穿衣偏好)
- 查看用户衣柜里有哪些可选的衣物
- 综合以上信息,推荐今天穿什么
- 根据用户反馈,调整推荐
这是一个比"查天气"复杂得多的场景——它需要多个工具协作、多轮对话、个性化推理。
Step 1:安装 Eino
go get github.com/cloudwego/eino@latest
go get github.com/cloudwego/eino-ext@latest
Step 2:定义数据模型
首先,定义我们需要的数据结构:
package main

// 用户档案
type UserProfile struct {
    UserID      string   `json:"user_id"`
    Name        string   `json:"name"`
    Age         int      `json:"age"`
    Gender      string   `json:"gender"`      // male, female
    City        string   `json:"city"`        // 所在城市
    BodyType    string   `json:"body_type"`   // slim, medium, large
    HealthNotes string   `json:"health_notes"` // 健康备注,如:怕冷、关节炎
    StylePrefs  []string `json:"style_prefs"` // 风格偏好:casual, formal, sporty
    ColorPrefs  []string `json:"color_prefs"` // 颜色偏好
}

// 衣物信息
type ClothingItem struct {
    ID          string   `json:"id"`
    Type        string   `json:"type"`        // top, bottom, outerwear, shoes, accessory
    Name        string   `json:"name"`        // 衣物名称
    Color       string   `json:"color"`       // 颜色
    Style       string   `json:"style"`       // casual, formal, sporty
    WarmthLevel int      `json:"warmth_level"` // 保暖等级 1-5
    Occasions   []string `json:"occasions"`   // 适合场合
    ImageURL    string   `json:"image_url"`   // 图片链接
}

// 天气信息
type WeatherInfo struct {
    City        string `json:"city"`
    Temperature int    `json:"temperature"`  // 摄氏度
    FeelsLike   int    `json:"feels_like"`   // 体感温度
    Humidity    int    `json:"humidity"`     // 湿度
    Condition   string `json:"condition"`    // 天气状况:晴、多云、雨、雪
    WindSpeed   int    `json:"wind_speed"`   // 风速
    UVIndex     int    `json:"uv_index"`     // 紫外线指数
}

// 穿搭推荐
type OutfitRecommendation struct {
    Top        *ClothingItem `json:"top"`
    Bottom     *ClothingItem `json:"bottom"`
    Outerwear  *ClothingItem `json:"outerwear,omitempty"`
    Shoes      *ClothingItem `json:"shoes"`
    Accessory  *ClothingItem `json:"accessory,omitempty"`
    Reason     string        `json:"reason"`     // 推荐理由
    StyleTips  string        `json:"style_tips"` // 穿搭小贴士
}
Step 3:定义工具(Tools)
穿衣助手需要 4 个工具:
工具 1:获取天气
func NewWeatherTool() tool.InvokableTool {
return tool.NewTool(
&schema.ToolInfo{
Name: "get_weather",
Description: "获取指定城市的当前天气信息,包括温度、体感温度、湿度、天气状况等",
Parameters: map[string]interface{}{
"type": "object",
"properties": map[string]interface{}{
"city": map[string]interface{}{
"type": "string",
"description": "城市名称,如:北京、上海、杭州",
},
},
"required": []string{"city"},
},
},
func(ctx context.Context, input string) (string, error) {
var params struct {
City string `json:"city"`
}
json.Unmarshal([]byte(input), ¶ms)
// 实际项目中调用天气 API,这里模拟
weather := WeatherInfo{
City: params.City,
Temperature: 8,
FeelsLike: 5,
Humidity: 65,
Condition: "多云",
WindSpeed: 15,
UVIndex: 2,
}
result, _ := json.Marshal(weather)
return string(result), nil
},
)
}
工具 2:获取用户档案
func NewUserProfileTool(profileStore map[string]*UserProfile) tool.InvokableTool {
return tool.NewTool(
&schema.ToolInfo{
Name: "get_user_profile",
Description: "获取用户的个人信息,包括年龄、性别、身体状况、穿衣风格偏好等",
Parameters: map[string]interface{}{
"type": "object",
"properties": map[string]interface{}{
"user_id": map[string]interface{}{
"type": "string",
"description": "用户ID",
},
},
"required": []string{"user_id"},
},
},
func(ctx context.Context, input string) (string, error) {
var params struct {
UserID string `json:"user_id"`
}
json.Unmarshal([]byte(input), ¶ms)
profile, ok := profileStore[params.UserID]
if !ok {
return `{"error": "用户不存在"}`, nil
}
result, _ := json.Marshal(profile)
return string(result), nil
},
)
}
工具 3:查询衣柜
func NewWardrobeTool(wardrobeStore map[string][]*ClothingItem) tool.InvokableTool {
return tool.NewTool(
&schema.ToolInfo{
Name: "get_wardrobe",
Description: "获取用户衣柜中的所有衣物,可按类型筛选(top上衣、bottom下装、outerwear外套、shoes鞋子、accessory配饰)",
Parameters: map[string]interface{}{
"type": "object",
"properties": map[string]interface{}{
"user_id": map[string]interface{}{
"type": "string",
"description": "用户ID",
},
"clothing_type": map[string]interface{}{
"type": "string",
"description": "衣物类型筛选,可选:top, bottom, outerwear, shoes, accessory。不填则返回全部",
},
},
"required": []string{"user_id"},
},
},
func(ctx context.Context, input string) (string, error) {
var params struct {
UserID string `json:"user_id"`
ClothingType string `json:"clothing_type"`
}
json.Unmarshal([]byte(input), ¶ms)
items, ok := wardrobeStore[params.UserID]
if !ok {
return `{"error": "衣柜为空"}`, nil
}
// 按类型筛选
if params.ClothingType != "" {
filtered := make([]*ClothingItem, 0)
for _, item := range items {
if item.Type == params.ClothingType {
filtered = append(filtered, item)
}
}
items = filtered
}
result, _ := json.Marshal(items)
return string(result), nil
},
)
}
工具 4:保存用户反馈
func NewFeedbackTool(feedbackStore map[string][]string) tool.InvokableTool {
return tool.NewTool(
&schema.ToolInfo{
Name: "save_feedback",
Description: "保存用户对穿搭推荐的反馈,用于改进后续推荐",
Parameters: map[string]interface{}{
"type": "object",
"properties": map[string]interface{}{
"user_id": map[string]interface{}{
"type": "string",
"description": "用户ID",
},
"feedback_type": map[string]interface{}{
"type": "string",
"description": "反馈类型:like(喜欢)、dislike(不喜欢)、too_warm(太热)、too_cold(太冷)、wrong_style(风格不对)",
},
"feedback_detail": map[string]interface{}{
"type": "string",
"description": "详细反馈内容",
},
},
"required": []string{"user_id", "feedback_type"},
},
},
func(ctx context.Context, input string) (string, error) {
var params struct {
UserID string `json:"user_id"`
FeedbackType string `json:"feedback_type"`
FeedbackDetail string `json:"feedback_detail"`
}
json.Unmarshal([]byte(input), ¶ms)
feedback := fmt.Sprintf("[%s] %s: %s",
time.Now().Format("2006-01-02 15:04"),
params.FeedbackType,
params.FeedbackDetail)
feedbackStore[params.UserID] = append(feedbackStore[params.UserID], feedback)
return `{"status": "反馈已保存,感谢您的意见!"}`, nil
},
)
}
Step 4:创建 ChatModel
package main

import (
    "context"
    "os"

    "github.com/cloudwego/eino-ext/components/model/openai"
)

func NewChatModel() (*openai.ChatModel, error) {
    return openai.NewChatModel(context.Background(), &openai.ChatModelConfig{
        Model:   "gpt-4-turbo",
        APIKey:  os.Getenv("OPENAI_API_KEY"),
        BaseURL: "https://api.openai.com/v1", // 或者用 OpenRouter
    })
}
Step 5:构建穿衣助手 Agent
package main

import (
    "context"
    "fmt"

    "github.com/cloudwego/eino/components/tool"
    "github.com/cloudwego/eino/flow/agent/react"
    "github.com/cloudwego/eino/schema"
)

// 系统提示词——这是穿衣助手的"灵魂"
const SystemPrompt = `你是一个专业的智能穿衣助手,帮助用户根据天气、个人情况和衣柜中的衣物,推荐今天的穿搭。

## 工作流程

1. **了解用户**:首先使用 get_user_profile 获取用户的基本信息(年龄、性别、身体状况、穿衣偏好)
2. **查看天气**:使用 get_weather 获取用户所在城市的天气
3. **查看衣柜**:使用 get_wardrobe 查看用户有哪些衣物可选
4. **综合推荐**:根据以上信息,给出穿搭建议

## 推荐原则

- **健康优先**:如果用户有健康问题(如怕冷、关节炎),要特别注意保暖
- **场合适配**:根据用户今天的安排(如果用户提到了)选择合适的风格
- **个性尊重**:尽量符合用户的风格和颜色偏好
- **天气适应**:
  - 温度 < 10°C:需要外套,注意保暖
  - 温度 10-20°C:可穿轻薄外套或厚衬衫
  - 温度 > 20°C:轻便穿着
  - 下雨:建议防水外套或带伞
  - 大风:避免裙装或宽松衣物

## 输出格式

推荐时请包含:
1. 具体的衣物搭配(从用户衣柜中选择)
2. 为什么这样搭配的理由
3. 穿搭小贴士

## 反馈处理

如果用户对推荐不满意,请:
1. 使用 save_feedback 保存用户反馈
2. 根据反馈调整推荐(如:太冷就加衣服,风格不对就换一套)
3. 给出新的推荐
`

func main() {
    ctx := context.Background()

    // 1. 初始化数据存储(实际项目中这些会是数据库)
    profileStore := initUserProfiles()
    wardrobeStore := initWardrobes()
    feedbackStore := make(map[string][]string)

    // 2. 创建 ChatModel
    chatModel, err := NewChatModel()
    if err != nil {
        panic(err)
    }

    // 3. 创建所有工具
    tools := []tool.BaseTool{
        NewWeatherTool(),
        NewUserProfileTool(profileStore),
        NewWardrobeTool(wardrobeStore),
        NewFeedbackTool(feedbackStore),
    }

    // 4. 创建穿衣助手 Agent
    agent, err := react.NewAgent(ctx, &react.AgentConfig{
        Model:         chatModel,
        Tools:         tools,
        SystemPrompt:  SystemPrompt,
        MaxIterations: 15, // 允许多轮工具调用
    })
    if err != nil {
        panic(err)
    }

    // 5. 开始对话
    userID := "user_001"

    // 第一轮:请求推荐
    input := []*schema.Message{
        schema.UserMessage(fmt.Sprintf(
            "我是用户 %s,今天要去参加一个商务会议,帮我看看穿什么合适?",
            userID,
        )),
    }

    output, err := agent.Run(ctx, input)
    if err != nil {
        panic(err)
    }
    fmt.Println("🤖 穿衣助手:", output.Content)

    // 第二轮:用户反馈
    input = append(input,
        schema.AssistantMessage(output.Content),
        schema.UserMessage("感觉你推荐的外套有点太正式了,我想要休闲一点的"),
    )

    output, err = agent.Run(ctx, input)
    if err != nil {
        panic(err)
    }
    fmt.Println("🤖 穿衣助手:", output.Content)
}

// 初始化用户档案(模拟数据)
func initUserProfiles() map[string]*UserProfile {
    return map[string]*UserProfile{
        "user_001": {
            UserID:      "user_001",
            Name:        "张三",
            Age:         35,
            Gender:      "male",
            City:        "北京",
            BodyType:    "medium",
            HealthNotes: "轻微怕冷,膝盖有时不舒服",
            StylePrefs:  []string{"casual", "business_casual"},
            ColorPrefs:  []string{"藏青色", "灰色", "白色"},
        },
    }
}

// 初始化衣柜(模拟数据)
func initWardrobes() map[string][]*ClothingItem {
    return map[string][]*ClothingItem{
        "user_001": {
            // 上衣
            {ID: "t001", Type: "top", Name: "白色牛津纺衬衫", Color: "白色", Style: "business_casual", WarmthLevel: 2},
            {ID: "t002", Type: "top", Name: "藏青色羊毛衫", Color: "藏青色", Style: "casual", WarmthLevel: 4},
            {ID: "t003", Type: "top", Name: "灰色圆领T恤", Color: "灰色", Style: "casual", WarmthLevel: 1},
            {ID: "t004", Type: "top", Name: "条纹POLO衫", Color: "蓝白条纹", Style: "business_casual", WarmthLevel: 2},
            // 下装
            {ID: "b001", Type: "bottom", Name: "深灰色西裤", Color: "深灰色", Style: "formal", WarmthLevel: 3},
            {ID: "b002", Type: "bottom", Name: "卡其色休闲裤", Color: "卡其色", Style: "casual", WarmthLevel: 3},
            {ID: "b003", Type: "bottom", Name: "深蓝色牛仔裤", Color: "深蓝色", Style: "casual", WarmthLevel: 3},
            // 外套
            {ID: "o001", Type: "outerwear", Name: "藏青色羊毛大衣", Color: "藏青色", Style: "formal", WarmthLevel: 5},
            {ID: "o002", Type: "outerwear", Name: "灰色针织开衫", Color: "灰色", Style: "casual", WarmthLevel: 3},
            {ID: "o003", Type: "outerwear", Name: "黑色皮夹克", Color: "黑色", Style: "casual", WarmthLevel: 4},
            {ID: "o004", Type: "outerwear", Name: "卡其色风衣", Color: "卡其色", Style: "business_casual", WarmthLevel: 4},
            // 鞋子
            {ID: "s001", Type: "shoes", Name: "黑色皮鞋", Color: "黑色", Style: "formal", WarmthLevel: 2},
            {ID: "s002", Type: "shoes", Name: "棕色乐福鞋", Color: "棕色", Style: "business_casual", WarmthLevel: 2},
            {ID: "s003", Type: "shoes", Name: "白色运动鞋", Color: "白色", Style: "casual", WarmthLevel: 2},
        },
    }
}
Step 6:运行效果演示
当用户说"今天要去参加商务会议",Agent 会:
-
调用 get_user_profile:获取用户信息
json {"name": "张三", "age": 35, "gender": "male", "city": "北京", "health_notes": "轻微怕冷,膝盖有时不舒服", "style_prefs": ["casual", "business_casual"]} -
调用 get_weather:查询北京天气
json {"city": "北京", "temperature": 8, "feels_like": 5, "condition": "多云", "wind_speed": 15} -
调用 get_wardrobe:查看可选衣物
json [{"name": "白色牛津纺衬衫", ...}, {"name": "藏青色羊毛衫", ...}, ...] -
综合推理:
- 温度 8°C,体感 5°C → 需要保暖
- 用户怕冷、膝盖不好 → 额外注意保暖
- 商务会议 → business_casual 风格
-
用户偏好藏青色、灰色
-
输出推荐: ``` 🤖 穿衣助手:
根据今天北京的天气(8°C,体感5°C,多云有风)和您的商务会议需求, 我从您的衣柜中为您搭配了这套:
👔 上衣:白色牛津纺衬衫 + 藏青色羊毛衫(叠穿) 👖 下装:深灰色西裤 🧥 外套:卡其色风衣 👞 鞋子:棕色乐福鞋
💡 推荐理由: - 考虑到您轻微怕冷且膝盖不适,选择了保暖性较好的羊毛衫叠穿 - 风衣既能保暖又不会过于正式,符合 business_casual 风格 - 藏青色+卡其色+棕色的配色经典稳重,适合商务场合
⚠️ 小贴士:今天风大,建议把风衣扣子系好; 膝盖不舒服的话,可以在西裤里穿一条薄款保暖裤。 ```
Step 7:处理用户反馈
当用户说"外套太正式了,想要休闲一点":
- 调用 save_feedback:保存反馈
- 重新推理:换一件更休闲的外套
- 输出新推荐: ``` 🤖 穿衣助手:
明白了!既然您想休闲一点,我换一套推荐:
👔 上衣:条纹POLO衫 + 藏青色羊毛衫 👖 下装:卡其色休闲裤 🧥 外套:灰色针织开衫(天气转暖后可脱掉) 👞 鞋子:棕色乐福鞋
这套更休闲但依然得体,适合不那么正式的商务场合。 如果会议室温度高,可以把针织开衫脱掉,POLO衫单穿也很精神。 ```
Step 8:添加流式输出
让推荐过程更有"交互感":
// 流式运行
stream, err := agent.Stream(ctx, input)
if err != nil {
    panic(err)
}

fmt.Print("🤖 穿衣助手: ")
for {
    chunk, err := stream.Recv()
    if err == io.EOF {
        break
    }
    if err != nil {
        panic(err)
    }
    fmt.Print(chunk.Content) // 实时打印,有"正在思考"的感觉
}
fmt.Println()
四、进阶:Graph 编排
ReAct Agent 是 Eino 提供的"开箱即用"方案。但如果你需要更复杂的工作流,就要用到 Graph 编排。
场景:穿衣助手的并行优化
上面的 ReAct Agent 是串行调用工具的:先查用户 → 再查天气 → 再查衣柜。
但其实这三个查询是可以并行的!用 Graph 编排可以优化性能:
                ┌─→ 查询用户档案 ─┐
用户输入 → 解析 → │                │ → 综合推理 → 生成推荐
                ├─→ 查询天气 ────┤
                └─→ 查询衣柜 ────┘
用 Graph 实现
package main

import (
    "context"

    "github.com/cloudwego/eino/compose"
    "github.com/cloudwego/eino/schema"
)

// 穿衣推荐的中间状态
type OutfitContext struct {
    UserID   string          `json:"user_id"`
    Profile  *UserProfile    `json:"profile"`
    Weather  *WeatherInfo    `json:"weather"`
    Wardrobe []*ClothingItem `json:"wardrobe"`
}

func BuildOutfitGraph(ctx context.Context) (*compose.CompiledGraph, error) {
    // 创建 Graph
    graph := compose.NewGraph[*OutfitContext, *OutfitRecommendation]()

    // 添加并行执行的节点
    graph.AddLambdaNode("fetch_profile", fetchProfileFunc)
    graph.AddLambdaNode("fetch_weather", fetchWeatherFunc)
    graph.AddLambdaNode("fetch_wardrobe", fetchWardrobeFunc)

    // 添加聚合节点(等待所有并行节点完成)
    graph.AddLambdaNode("aggregate", aggregateFunc)

    // 添加推理节点
    graph.AddChatModelNode("recommend", recommendModel)

    // 定义边(数据流向)——三个查询并行执行
    graph.AddEdge(compose.START, "fetch_profile")
    graph.AddEdge(compose.START, "fetch_weather")
    graph.AddEdge(compose.START, "fetch_wardrobe")

    // 三个查询都完成后,汇聚到 aggregate
    graph.AddEdge("fetch_profile", "aggregate")
    graph.AddEdge("fetch_weather", "aggregate")
    graph.AddEdge("fetch_wardrobe", "aggregate")

    // 聚合后生成推荐
    graph.AddEdge("aggregate", "recommend")
    graph.AddEdge("recommend", compose.END)

    // 编译 Graph
    return graph.Compile(ctx)
}

func main() {
    ctx := context.Background()

    compiledGraph, err := BuildOutfitGraph(ctx)
    if err != nil {
        panic(err)
    }

    // 运行
    input := &OutfitContext{UserID: "user_001"}
    recommendation, err := compiledGraph.Invoke(ctx, input)
    if err != nil {
        panic(err)
    }

    fmt.Printf("推荐穿搭:%s + %s + %s\n",
        recommendation.Top.Name,
        recommendation.Bottom.Name,
        recommendation.Outerwear.Name,
    )
    fmt.Printf("理由:%s\n", recommendation.Reason)
}
条件分支:根据天气选择推荐策略
不同天气需要不同的穿搭策略:
// 添加条件分支——根据天气分流
graph.AddBranch("weather_router", func(ctx context.Context, input *OutfitContext) string {
    if input.Weather.Temperature < 5 {
        return "cold_strategy"    // 寒冷天气策略:保暖优先
    } else if input.Weather.Temperature > 28 {
        return "hot_strategy"     // 炎热天气策略:透气优先
    } else if input.Weather.Condition == "雨" {
        return "rainy_strategy"   // 雨天策略:防水优先
    }
    return "normal_strategy"      // 普通天气策略
})

graph.AddEdge("weather_router", "cold_strategy")
graph.AddEdge("weather_router", "hot_strategy")
graph.AddEdge("weather_router", "rainy_strategy")
graph.AddEdge("weather_router", "normal_strategy")
添加回调(日志、追踪)
记录每个步骤的执行情况,方便调试:
// 创建回调处理器
handler := callbacks.NewHandlerBuilder().
    OnStartFn(func(ctx context.Context, info *callbacks.RunInfo, input callbacks.CallbackInput) context.Context {
        log.Printf("👀 [%s] 开始执行", info.Name)
        if info.Name == "fetch_weather" {
            log.Printf("   正在查询天气...")
        } else if info.Name == "recommend" {
            log.Printf("   正在生成穿搭推荐...")
        }
        return ctx
    }).
    OnEndFn(func(ctx context.Context, info *callbacks.RunInfo, output callbacks.CallbackOutput) context.Context {
        log.Printf("✅ [%s] 执行完成", info.Name)
        if info.Name == "fetch_weather" {
            if weather, ok := output.(*WeatherInfo); ok {
                log.Printf("   天气:%s,温度:%d°C", weather.Condition, weather.Temperature)
            }
        }
        return ctx
    }).
    OnErrorFn(func(ctx context.Context, info *callbacks.RunInfo, err error) context.Context {
        log.Printf("❌ [%s] 执行出错: %v", info.Name, err)
        return ctx
    }).
    Build()

// 运行时传入回调
recommendation, err := compiledGraph.Invoke(ctx, input, compose.WithCallbacks(handler))
执行时会输出:
👀 [fetch_profile] 开始执行
👀 [fetch_weather] 开始执行
   正在查询天气...
👀 [fetch_wardrobe] 开始执行
✅ [fetch_profile] 执行完成
✅ [fetch_weather] 执行完成
   天气:多云,温度:8°C
✅ [fetch_wardrobe] 执行完成
👀 [aggregate] 开始执行
✅ [aggregate] 执行完成
👀 [recommend] 开始执行
   正在生成穿搭推荐...
✅ [recommend] 执行完成
五、Eino vs LangChain:Go 开发者怎么选?
| 维度 | Eino (Go) | LangChain (Python) |
|---|---|---|
| 语言 | Go | Python |
| 类型安全 | ✅ 编译时检查 | ❌ 运行时检查 |
| 性能 | ✅ 高 | 一般 |
| 部署 | ✅ 单二进制 | 需要 Python 环境 |
| 生态丰富度 | 一般(在快速增长) | ✅ 非常丰富 |
| 文档完善度 | 一般 | ✅ 完善 |
| 社区活跃度 | 活跃 | ✅ 非常活跃 |
| 学习曲线 | 需要懂 Go | 更低 |
我的建议:
- 如果你的团队是 Go 技术栈,选 Eino
- 如果你需要高性能、低资源占用,选 Eino
- 如果你需要最丰富的组件和示例,选 LangChain
- 如果你是 AI 应用新手,先用 LangChain 入门,再迁移到 Eino
六、常见问题与坑点
1. 流处理的 EOF 处理
// 错误写法:忘记处理 EOF
for {
    chunk, err := stream.Recv()
    if err != nil {
        panic(err) // EOF 也会触发 panic!
    }
    fmt.Print(chunk.Content)
}

// 正确写法
for {
    chunk, err := stream.Recv()
    if err == io.EOF {
        break // 正常结束
    }
    if err != nil {
        panic(err) // 真正的错误
    }
    fmt.Print(chunk.Content)
}
2. Tool 的 JSON Schema 要写对
LLM 依赖 JSON Schema 来理解工具的参数。如果 Schema 写错了,LLM 可能无法正确调用工具。
// 错误:缺少 description,LLM 不知道参数的含义
"properties": map[string]interface{}{
    "user_id": map[string]interface{}{
        "type": "string",
    },
    "clothing_type": map[string]interface{}{
        "type": "string",
    },
}

// 正确:有清晰的 description 和示例
"properties": map[string]interface{}{
    "user_id": map[string]interface{}{
        "type":        "string",
        "description": "用户ID,如:user_001",
    },
    "clothing_type": map[string]interface{}{
        "type":        "string",
        "description": "衣物类型,可选值:top(上衣)、bottom(下装)、outerwear(外套)、shoes(鞋子)、accessory(配饰)",
    },
}
3. 多工具协作时的状态管理
穿衣助手需要多个工具协作,要注意状态的一致性:
// 错误:每次调用都重新查询,效率低且可能不一致
func recommendOutfit(ctx context.Context, userID string) (*OutfitRecommendation, error) {
    profile := fetchProfile(userID)  // 第一次查询
    weather := fetchWeather(profile.City)
    wardrobe := fetchWardrobe(userID) // 如果用户在这之间更新了档案怎么办?
    // ...
}

// 正确:用 Graph 编排确保状态一致
func BuildOutfitGraph() {
    // Graph 会在同一个 context 中管理所有状态
    // 并行查询时会共享同一个时间点的快照
}
4. Context 超时设置
穿衣推荐涉及多个工具调用,要设置合理的超时:
// 单次工具调用可能需要 5-10 秒
// 穿衣助手可能调用 4-5 次工具
// 设置 60 秒的总超时比较合理
ctx, cancel := context.WithTimeout(context.Background(), 60*time.Second)
defer cancel()

output, err := agent.Run(ctx, input)
5. 错误处理要完善
output, err := agent.Run(ctx, input)
if err != nil {
    // 区分不同类型的错误
    if errors.Is(err, context.DeadlineExceeded) {
        log.Println("⏰ 请求超时,可能是天气 API 响应慢")
    } else if errors.Is(err, context.Canceled) {
        log.Println("🚫 用户取消了请求")
    } else if strings.Contains(err.Error(), "rate limit") {
        log.Println("🔥 API 限流,请稍后重试")
    } else {
        log.Printf("❌ 未知错误: %v", err)
    }
    // 降级策略:返回一个通用推荐
    return defaultRecommendation, nil
}
6. 用户偏好的冲突处理
用户的偏好可能自相矛盾,Agent 需要智能处理:
// 场景:用户说"想穿休闲一点",但又说"今天有重要会议"
// 这两个需求可能冲突

// 在 SystemPrompt 中明确优先级
const SystemPrompt = `
...
## 冲突处理原则
当用户需求存在冲突时,按以下优先级处理:
1. 健康/舒适优先(怕冷就要保暖,膝盖不好就别穿裙子)
2. 场合需求(正式场合不能穿拖鞋)
3. 用户明确要求(用户最新说的话权重最高)
4. 历史偏好(作为兜底参考)
...
`
总结
| 概念 | 说明 |
|---|---|
| Eino | Go 语言的 AI 应用开发框架,类似 Python 的 LangChain |
| 组件 | ChatModel、Tool、Retriever 等标准化的"积木块" |
| Graph 编排 | 把组件串联成复杂工作流,支持并行、分支、循环 |
| 流处理 | 原生支持流式输出,自动处理流的拼接、复制、合并 |
| 回调 | OnStart、OnEnd、OnError 等切面,用于日志、追踪 |
| ReAct Agent | 开箱即用的"思考-行动-观察"循环 Agent |
| 多工具协作 | 一个 Agent 可以调用多个 Tool,综合信息进行推理 |
穿衣助手架构回顾
┌─────────────────────────────────────────────────────────────┐
│                     智能穿衣助手 Agent                        │
├─────────────────────────────────────────────────────────────┤
│  SystemPrompt: 穿搭原则、推荐流程、反馈处理                      │
├─────────────────────────────────────────────────────────────┤
│  Tools:                                                      │
│  ┌──────────┐ ┌──────────┐ ┌──────────┐ ┌──────────┐        │
│  │ 天气查询  │ │ 用户档案  │ │ 衣柜查询  │ │ 反馈保存  │        │
│  │ Tool     │ │ Tool     │ │ Tool     │ │ Tool     │        │
│  └──────────┘ └──────────┘ └──────────┘ └──────────┘        │
├─────────────────────────────────────────────────────────────┤
│  ChatModel: GPT-4 / Claude / 本地模型                         │
├─────────────────────────────────────────────────────────────┤
│  Callbacks: 日志、追踪、监控                                   │
└─────────────────────────────────────────────────────────────┘
Checklist:你可以现在就做的事
- [ ] 安装 Eino:
go get github.com/cloudwego/eino@latest - [ ] 跑一下官方示例:eino-examples
- [ ] 定义你的第一个 Tool(比如天气查询、用户档案查询)
- [ ] 写好 JSON Schema(description 写清楚,LLM 才能正确调用)
- [ ] 构建一个 ReAct Agent,让它能调用多个 Tool
- [ ] 设计 SystemPrompt(定义 Agent 的"灵魂":工作流程、推荐原则、冲突处理)
- [ ] 尝试用 Graph 编排实现并行查询
- [ ] 添加 Callback,把执行日志打印出来
- [ ] 处理用户反馈:保存反馈、调整推荐、多轮对话
扩展阅读
- Eino GitHub — 官方仓库
- Eino 官方文档 — 详细教程
- Eino Quick Start — 快速入门
- Eino Examples — 示例代码
- CloudWeGo — 字节跳动开源的 Go 微服务生态
最后:穿衣助手只是开始
回到开篇的问题:今天穿什么?
现在我有了答案——让 AI 帮我想。
这个"穿衣助手"只是一个 Demo,但它展示了 AI Agent 的核心能力:
- 多工具协作:天气、用户档案、衣柜——Agent 能自己决定什么时候调用什么工具
- 个性化推理:不是简单的 if-else,而是综合多个因素的智能推荐
- 对话式交互:用户不满意?说出来,Agent 会调整
这些能力可以迁移到无数场景:
- 旅行助手:查机票、查酒店、查景点、做行程——你只需要说"帮我规划去日本的行程"
- 健康顾问:查体检报告、查饮食记录、查运动数据——给出个性化的健康建议
- 代码审查员:读代码、查规范、跑测试——自动给出改进建议
Go 开发者终于有了自己的"LangChain"。
Eino 还很年轻(2024 年底才开源),生态还在建设中。但它的设计理念是对的:类型安全、高性能、原生流处理。
如果你是 Go 开发者,想做 AI 应用,Eino 值得一试。
如果你在使用过程中遇到问题,可以去 GitHub Issues 提问,或者加入他们的飞书群交流。
从明天开始,让 AI 帮你挑衣服。 😄
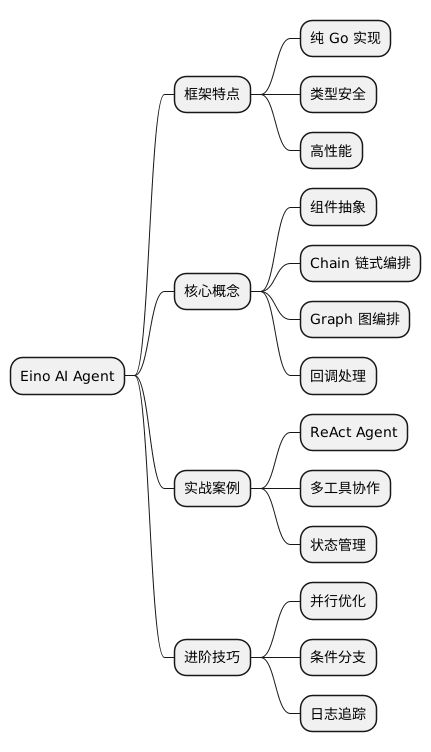
@startmindmap
* Eino AI Agent
** 框架特点
*** 纯 Go 实现
*** 类型安全
*** 高性能
** 核心概念
*** 组件抽象
*** Chain 链式编排
*** Graph 图编排
*** 回调处理
** 实战案例
*** ReAct Agent
*** 多工具协作
*** 状态管理
** 进阶技巧
*** 并行优化
*** 条件分支
*** 日志追踪
@endmindmap
本作品采用知识共享署名-非商业性使用-禁止演绎 4.0 国际许可协议进行许可。